Tips For Solid Bike Photography
Having the perpetual thirst and urge for snapping random bikes I stumble upon, I can’t imagine any of you bike-possessors & connoisseurs alike not sharing that same impulse! So before embarking in rolling out that lens on your two-wheeled beau, let’s zoom on in on this painstaking photo-taking!
Sun (lighting)
As with all things photography, lighting is quintessential. Thus, you’d want to keep the location less shadowy; with that I mean, a clean & scenic yet canvas type of background with minimal distractions to the subject

Pro Tip :Use the “fill flash” feature to uplift your image quality (fill out shadows lurking in the background)
Angles
..or I’d like to dub it the prehistoric Altered (Augmented) Reality. Treat this angle as your bike shots’ best friend. Even food photography enthusiasts swear by this! This high vantage point trick almost always wins as it highlights the majority of the subject
Tip: simply place the bike at a ¾ angle from the camera.
At this position, your camera and lens line should be around a 45-degree angle to thebike from above or below
.
That slight shift in perspective is what you need in giving your bike shots a great boost in standing out like a sore thumb (after getting your thumb sore that is!)
Pro Tip: squatting or sinking to your knees aren’t just moves confined to the gym cos these are moves handy when attempting this shot or you can alternate it between some high standing (no hard-and-fast rule on this one; ¾ below or ¾ above; whichever works best!)

And that also means lowering your eyes and camera to the level of the tank or headlight. This is that sure shot trick that makes every bike shot look incredible.
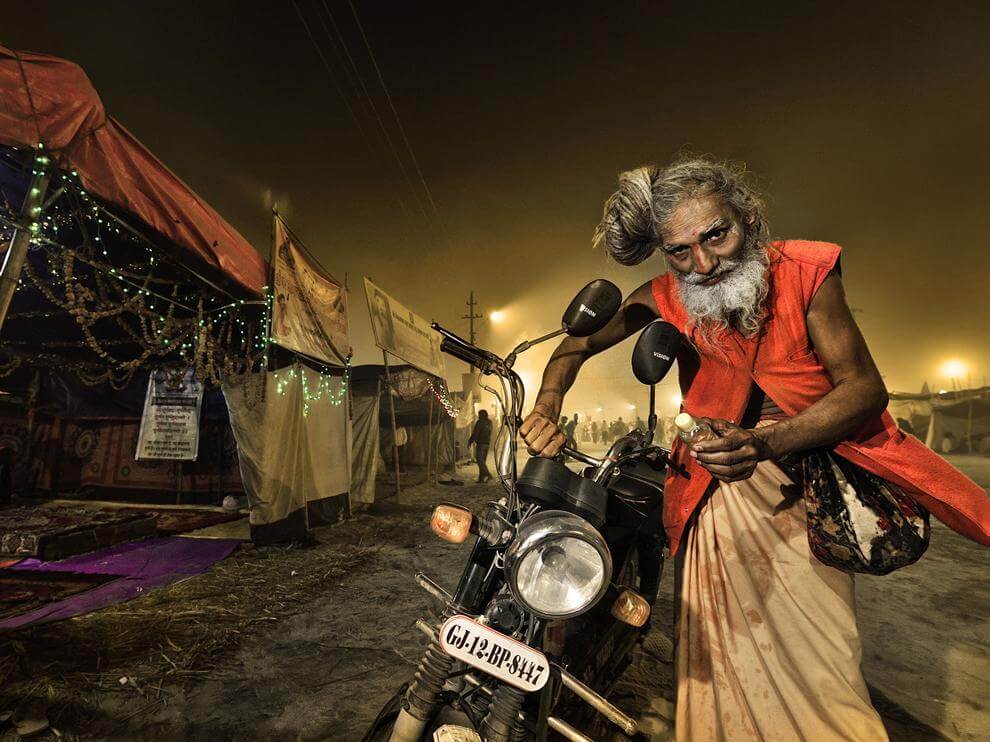
Bike-Biker-Scenery Photography
If you’re going to photograph a biker, you want to target the subject’s facial expressions with the aim of portraying the feelings that come with riding!
Also, try to alternate using the "negative space" technique to avoid images coming off too bike-centric as you want to create a dymanic shot where your focus is on the bike yet diverting the viewer's attention to the backdrop for a taste of the location setting.

This is useful as it shifts the viewer from the subject yet drawing the needed attention to it so, it doesn’t have the in-your-face feel.
The Aftermath
With great snapping, comes great responsibility and hence, you don't want to put all your efforts to waste without considering image refining options.
The likes of photo-editing software such as Pixlr, Fotor, Photoshop & Lightroom offer a range of features to best complement your pictures.

Keep Shooting
Keep shooting until you like what you’re getting from your camera, and you’ll find yourself loving the process.
Like every other skill, practice only makes perfect, so you really want to just keep shooting until you like what you’re seeing on your camera and soon enough, you’ll develop a deep interest to it!
Look out and continue to explore for different locations while carefully inspecting your results .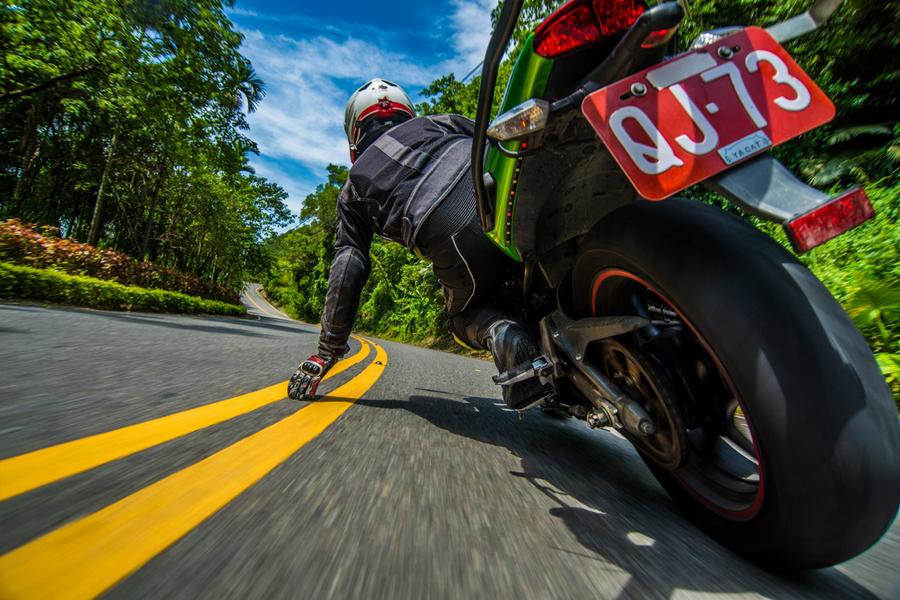
In turn, you’ll also realize it’s a great platform to meet fellow bike enthusiasts to expand your biker circle.
Now that you're well on your way there, keep in mind that these are mere guidelines and not solid rules!